I’ll never forget the first time I sat down for a “quick” lunch of spinach salad and sourdough bread after getting my permanent metal braces. I thought I was being healthy, but by the time I looked in the mirror, I looked like I’d been chewing on a lawnmower. I spent twenty minutes poking, prodding, and eventually making my gums bleed trying to get those tiny green fibers out from behind the wire. It was a humiliating realization: my old routine was officially dead. I made the classic mistake of thinking I could just “brush harder” to get the job done, but all that did was make my gums sore and leave me wondering why your teeth feel fuzzy even after you brush them. If you are currently feeling like your mouth is a magnet for every crumb within a five-mile radius, I promise you, there is a better way. Today, I’m sharing the exact routine that saved my sanity (and my enamel) so you don’t have to dread every meal.
Your Toothbrush Is No Longer the Star of the Show
When you have a mouth full of metal, your toothbrush becomes more of a support player rather than the lead actor. I used to think that as long as I had a fancy electric brush, I was golden. But those brackets create a literal obstacle course for bristles. I learned the hard way that missing even one tiny spot daily leads to those terrifying white spots—decalcification—that stay forever once the braces come off. It’s a common hurdle discussed in any solid family dentistry guide, but it hits differently when it’s your own smile on the line. Have you ever spent more than five minutes trying to dislodge one single piece of food? It’s frustrating, right? The secret isn’t more force; it’s more strategy. You have to navigate the “blind spots” that traditional brushing just can’t reach.
Does all this extra gear actually make a difference?
I know what you’re thinking: “Do I really need a water flosser, interdental brushes, AND special floss?” My early skepticism cost me a very awkward “talking to” from my orthodontist. I was lazy and skipped the specialized tools, which led to a localized infection—you might even notice why your gums bleed only in one specific spot when you neglect those tiny gaps. According to a study published in the Journal of Clinical Dentistry, orthodontic patients who use a water flosser in conjunction with manual brushing remove up to 74% more plaque than those who use floss and manual brushing alone. That’s a massive gap you can’t ignore. We are going to break down how to use these tools without turning your bathroom into a splash zone. Before we dive into the step-by-step, let’s talk about the prep work, including knowing the best foods to eat when your new braces are sore to make the whole cleaning process less of a chore.
Start with a High-Pressure Flush
Before you even touch a toothbrush, you need to clear the heavy debris. Think of your braces like a storm drain; if you don’t clear the leaves first, the fine cleaning won’t matter. I use a water flosser on a medium setting to blast out the large particles trapped between the brackets and the archwire. I remember one specific Friday night after a taco dinner where I thought I was ‘clean’ after a quick rinse. Five minutes with the water flosser proved me wrong as enough cilantro to start a garden hit the sink. If you skip this, you’re just moving food around with your brush, which explains why your teeth feel fuzzy even after you brush them.
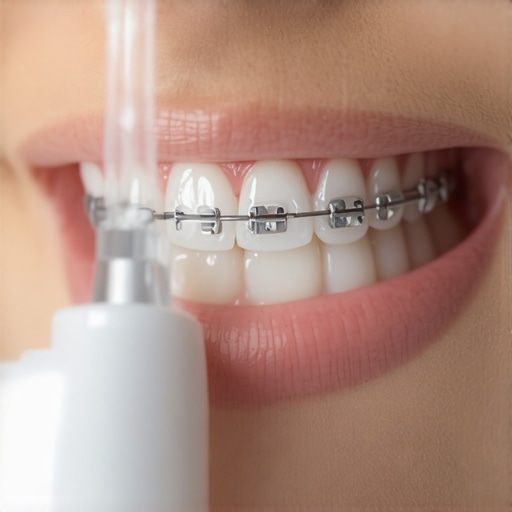
Keep the Water Stream Perpendicular
To get the most out of your water flosser, aim the tip at a 90-degree angle to the tooth and the wire. Start at the back molars and follow the gum line, pausing briefly between each tooth. This isn’t just about food; it’s about disrupting the biofilm that leads to gum disease. If you find that why your gums bleed only in one specific spot, pay extra attention to that area with a lower pressure setting until the inflammation subsides.
The Right Way to Angle Your Brush
Standard brushing involves a lot of circular motions, but with metal brackets, you need a three-lane approach. First, brush the tops of the brackets angling the bristles downward. Then, brush the bottoms of the brackets angling the bristles upward. Finally, brush the flat surfaces. This ensures the bristles actually get under the wire where the most damage occurs. Because your hardware is constantly grinding down the bristles, you should check the truth about how often you should replace your toothbrush head, as frayed bristles won’t clean effectively around metal.
Don’t Ignore the Gum Line
Many patients focus so much on the metal that they forget the soft tissue. Brushing too hard can lead to issues, but being too gentle allows plaque to accumulate at the base of the tooth. If you notice why your gums are receding despite using a soft toothbrush, you might be scrubbing too aggressively rather than using precise, vibrating motions. The goal is to tickle the gum line, not sand it down.
Tiny Brushes for Big Problems
Interdental brushes, those little ‘Christmas tree’ tools, are your best friend for the spaces between the wire and the tooth. I carry a pack of these everywhere. During a wedding last summer, I felt a sharp sensation and realized a piece of crusty bread had wedged itself right against my gum. A quick trip to the bathroom with an interdental brush saved me from an evening of pain. These tools are also great for identifying if you need to learn how to fix a sharp wire poking your cheek at home, as they help you feel if something has shifted. Using these daily is a cornerstone of any family dentistry guide because they reach the 30% of tooth surfaces that a regular brush simply cannot touch.
I used to think that once you got a crown or a veneer, that tooth was basically armored for life. Everyone tells you it’s “permanent,” but in my experience, thinking a restoration is invincible is the quickest way to end up back in the dentist’s chair. In fact, the American Academy of Cosmetic Dentistry notes that while porcelain is incredibly strong, the natural tooth structure underneath remains susceptible to decay if the seal isn’t perfectly maintained. One of the biggest “oops” moments I’ve witnessed is the DIY repair attempt. Whatever you do, please avoid the danger of using super glue to fix a broken crown; those industrial chemicals can lead to tissue necrosis or even kill the nerve inside your tooth. Have you ever fallen into this trap? Let me know in the comments.
Sometimes, even when following a solid family dentistry guide, we miss the subtle warning signs of hardware failure. For example, if you’ve noticed why your gum line looks dark around an old crown, it’s often not just a cosmetic annoyance—it can be a sign that the margin is leaking or the internal metal substrate is oxidizing. This is where looking into cosmetic dentistry innovations to watch becomes vital, as modern all-ceramic materials eliminate that “grey line” while providing a much more biocompatible seal.
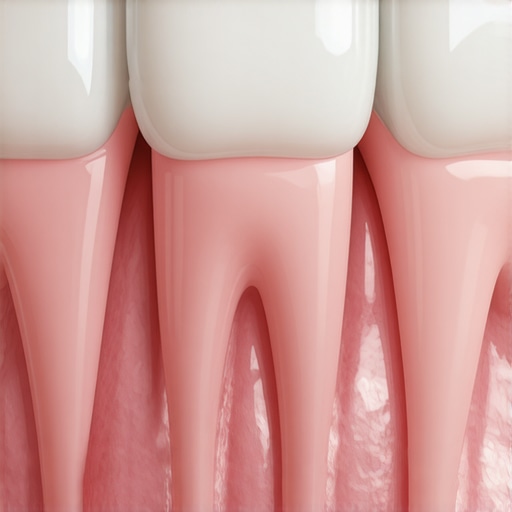
Is your cosmetic work hiding a deeper health issue?
Most people assume that because a tooth is capped, it’s essentially “off the hook” for future cavities. It’s actually the opposite. A study published in the Journal of Dentistry highlights that the margin—the tiny seam where the crown meets the natural tooth—is the most vulnerable point for plaque accumulation and secondary decay. If you don’t master the cleaning techniques we’ve discussed, you might find yourself searching for how to tell if your crown needs to be replaced immediately much sooner than the typical ten-year lifespan. When weighing dental crowns vs other restorations, remember that the hardware is only as good as the hygiene and gum health supporting it.
I used to think that the day I walked out of the office with a new porcelain restoration, the hard work was over. In reality, that’s just the starting line. If you want to avoid the headache of the real cost of delaying a necessary dental crown replacement later, you have to treat your dental work like a high-performance vehicle. You wouldn’t buy a Ferrari and never change the oil, right? For years, I relied on standard drug-store floss and a manual brush, but once I saw why your gums look dark around a dental crown due to tiny amounts of trapped bacteria, I overhauled my entire kit. I switched specifically to the Philips Sonicare ProtectiveClean series. Why? Because it has a built-in pressure sensor that pulses if you press too hard. Most of us over-scrub our margins, which leads to recession and exposes the underlying tooth. It’s about precision, not power.
The professional tools that actually protect your investment
Beyond the brush, the real game-changer for me was high-quality interproximal cleaners. While standard floss is fine, it often misses the slightly wider contours where a crown meets the gum. I now swear by the TePe interdental brushes. They allow you to mechanicaly scrub the ‘cradle’ of the tooth without shredding like traditional string. If you’ve been wondering the truth about the lifespan of composite vs porcelain veneers, the answer almost always comes down to how well you clean these microscopic junctions. Dr. Gordon Christensen, a leading authority in restorative dentistry and founder of Practical Clinical Courses, has frequently noted that the ‘longevity of a restoration is more dependent on the patient’s oral hygiene and occlusion management than the material itself.’ This means the tools you choose today determine if that crown lasts five years or twenty.
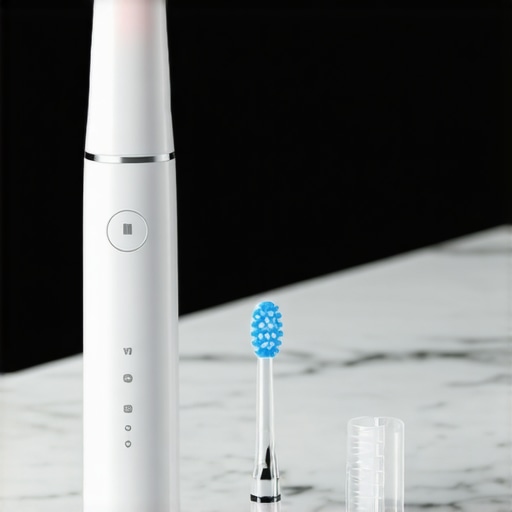
How do I maintain my dental work over time?
Consistency is the boring but honest answer, but the secret weapon is a custom-fitted occlusal guard. I used to wake up with a dull ache and wonder why your crown feels tight when you wake up. It turns out I was grinding my teeth into oblivion at 3 AM. Porcelain is incredibly strong, but it’s also brittle. One bad night of clenching can cause micro-fractures that you won’t see until the whole thing snaps while you’re eating a sandwich. If you are currently on the fence about the expense, consider the risks of skipping your night guard for just one week; the friction can wear down the opposing natural teeth and the crown’s glaze simultaneously. It’s the cheapest insurance policy you’ll ever buy for your smile.
AI and 3D printing are changing the game
Looking ahead, the way we maintain our smiles is about to get much more high-tech. I predict we are moving toward a world where ‘smart’ dental work is the norm. We are already seeing revamp your smile-top-cosmetic-dentistry-trends-for-2025 that include bio-active materials that actually release fluoride or calcium to the tooth structure underneath the crown. Soon, you might have an app that syncs with your toothbrush to tell you exactly which crown margin is showing signs of inflammation before you ever feel pain. This level of preventative data will make searching for how to tell if your crown needs to be replaced immediately a thing of the past. For now, my best advice is to stop ‘scrubbing’ and start ‘sweeping’—use your electric brush at a 45-degree angle and let the vibrations do the work. Give the pressure-sensor check a try tonight and see how much lighter you should actually be brushing.
The Hardest Lesson I Learned About Dental Maintenance
If there’s one thing I’ve realized after years of orthodontic and restorative work, it’s that ‘set it and forget it’ simply doesn’t exist in dentistry. I used to think a crown was an invincible shield, but I learned that the margin—the tiny seam where the crown meets the tooth—is actually the most vulnerable spot in your mouth. If you neglect it, you’ll quickly see why your gums look dark around a dental crown as bacteria begins to compromise the restoration. I also realized that waiting for pain is a trap; by the time you feel a throb, you’re likely facing the real cost of delaying a necessary dental crown replacement. My biggest lightbulb moment? Realizing that my dental hardware isn’t just about my teeth; it’s an investment in my overall health that requires a proactive, rather than reactive, mindset.
Tools That Actually Earn Their Spot on My Bathroom Counter
I’ve tested dozens of gadgets, but these four are the only ones that stayed in my permanent rotation. First, a high-quality water flosser is non-negotiable for reaching the debris that manual brushes leave behind. Second, I swear by interdental brushes because they allow for mechanical cleaning in gaps where string floss just slides through. I also believe every patient needs a solid family dentistry guide to reference for standard hygiene practices that prevent long-term damage. Finally, never underestimate the power of a custom night guard; understanding the risks of skipping your night guard for just one week changed how I protect my porcelain work from the silent damage of nocturnal grinding.
#IMAGE_PLACE_HOLDER_E#
Protect Your Smile Investment for the Long Haul
Your smile is one of the few things you wear every single day, and the effort you put in now determines how much confidence you’ll have ten years down the line. We are seeing incredible revamp your smile-top-cosmetic-dentistry-trends-for-2025 that make it easier than ever to maintain high-end work, but technology will never replace the foundation of good daily habits. Whether you’ve pursued transform-your-look-with-expert-cosmetic-dentistry-solutions or are just maintaining what you have, remember that consistency is the only way to ensure your smile remains both functional and beautiful. Your dental health is a marathon, not a sprint. Have you ever been surprised by how much effort it takes to keep your dental work clean, or do you have a favorite tool that makes it easier? Let me know in the comments below!