I stood in front of my bathroom mirror, frantically trying to press a slippery, chemical-smelling piece of plastic into the deep crevices between my overlapping lateral incisor and my front tooth. I was convinced that if I just pushed hard enough, I’d get that Hollywood glow. Instead, I ended up with a blotchy mess where the high points of my teeth were blindingly white, and the recessed parts stayed stubbornly yellow. It looked like my teeth were wearing a bad camouflage print. If you’ve ever felt that frustration, you aren’t alone. We all want that boost of confidence, but when your teeth aren’t perfectly straight, the one-size-fits-all approach of store-bought strips can fail you miserably. Today, I’m going to pull back the curtain on what actually happens when you use these strips on a crowded smile and how you can get real results without the patchwork look.
Why Standard Strips Create a Polka-Dot Disaster
I made the classic mistake of thinking force would solve everything. I spent weeks trying to fold and tuck those strips, but the physical reality is that whitening strips are designed for a flat surface. When your teeth overlap, the strip bridges over the gaps like a tightrope, leaving the recessed areas untouched by the peroxide gel. It’s one reason why your bottom teeth are suddenly crowding in your thirties can make your whitening routine feel like a losing battle. You end up highlighting the crookedness because the bright white spots create sharp contrast with the shadowed, un-whitened areas. Have you ever tried to whiten your teeth only to find it made the crowding look even more obvious? It’s a total gut-punch when you’re just trying to feel better about your smile.
Are these drugstore boxes actually worth the money?
For most people with significant crowding, the answer is a frustrating maybe. While they can lighten the surface, the American Academy of Cosmetic Dentistry notes that improper application can lead to uneven results and increased gingival irritation. If the strip isn’t making full contact with the tooth because of a snaggletooth, you are essentially wasting half the product. I learned the hard way that I needed to stop fighting my anatomy and start looking for expert cosmetic dentistry solutions that actually wrap around each individual tooth. It’s not just about the color; it’s about the delivery system. If you’ve struggled with zingers or pain during the process, you should definitely check out how to whiten sensitive teeth without the sharp shooting pains. We’re going to dive into the specific ways you can bypass the strip struggle, including the truth about professional whitening gels vs store bought strips, so you can finally get that even, radiant finish you’re after.
Swap the Strips for High-Viscosity Gels
If you want to reach those hidden nooks and crannies, you have to ditch the two-dimensional plastic strips. The physics simply don’t work for crowded smiles. Instead, look toward high-viscosity whitening gels. These formulas are thicker and designed to stay exactly where you put them rather than sliding around. When you use a gel with a precision applicator, you can manually guide the product into the overlaps that a strip would otherwise bypass. I remember one Tuesday night, sitting on my bathroom floor with a high-intensity flashlight and a tiny, sterilized makeup brush. I was manually painting the gel into the dark shadows where my incisors crossed over each other. It was tedious and I looked like a mad scientist, but for the first time, those stubborn yellow crevices actually started to lighten. This is why understanding the truth about professional whitening gels vs store bought strips is so critical; the delivery method is just as important as the chemical concentration.
The Precision Paint Method
To do this right at home, you need to dry your teeth completely first. Use a lint-free cloth or a gauze pad to wipe away saliva. If the tooth is wet, the gel will just slide right off into the abyss of your gum line. Once dry, use a small brush or a syringe tip to apply the gel specifically to the recessed areas first. Let it sit for thirty seconds to ‘tack’ before moving to the flatter surfaces. This ensures the most crowded areas get the longest exposure time. If you find your teeth are reacting poorly to the intensity, you can always pivot to the safest way to whiten teeth if you have thin enamel to avoid damaging your protective layer while seeking that glow. 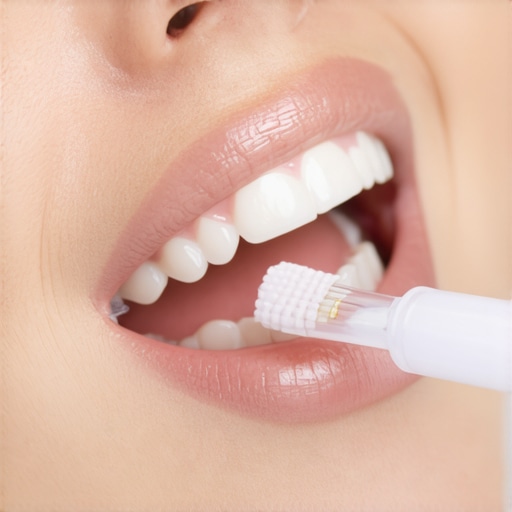
Custom Trays are the Only Real Solution for Deep Crowding
While DIY methods can help, they are often just a stopgap. For a truly even finish on a complex smile, you need a three-dimensional mold. Custom-fitted trays are created from an actual impression of your teeth, meaning the tray fits into every curve and overlap like a glove. This forces the whitening agent into direct contact with every square millimeter of enamel, including the parts that sit behind other teeth. This is a staple of expert cosmetic dentistry solutions because it eliminates the ‘camouflage’ effect I mentioned earlier. When the tray is molded to your unique anatomy, you don’t get the splotchy results common with boil-and-bite kits.
When Whitening Can’t Fix the Shadow
Sometimes, the ‘yellow’ you see isn’t just a stain; it’s a shadow cast by the position of the teeth themselves. If your crowding is severe, the way light hits your mouth will always create dark pockets. In these cases, you might want to look into revamp your smile top cosmetic dentistry trends for 2025 to see how modern alignment or even porcelain work can change the way light interacts with your smile. For teeth that are damaged or excessively dark due to internal issues, dental crowns explained might reveal a better path for both protection and aesthetics. Once you achieve that perfect shade, the trick is maintenance. Learning the secret to making professional teeth whitening results last longer will save you from having to repeat this intensive process every few months.Most people assume that if a little whitening gel is good, then leaving it on for twice the recommended time must be better. This is the biggest ‘trap’ in cosmetic dentistry. In my years of obsessing over dental aesthetics, I’ve seen this backfire spectacularly. When you over-process enamel, especially on crowded teeth where some areas are more porous than others, you risk reaching the ‘translucency point.’ Instead of looking bright and vibrant, your teeth start to look gray or even slightly blue. This happens because the enamel becomes so thin that the dark shadows of the oral cavity show through. It’s a nuance that store-bought kits never mention on the box. While you’re chasing a brighter look, be careful not to fall for the ‘natural’ trend; the truth about charcoal toothpaste and long term enamel damage is that it can strip your protective layer faster than any professional gel, leaving your crowded teeth even more vulnerable to deep-set stains.
Why Does My Whitening Always Look ‘Patchy’ After a Few Days?
According to a study published in the Journal of Evidence-Based Dental Practice, the immediate ‘wow’ factor of whitening is often exaggerated by tooth dehydration. As the tooth reabsorbs moisture over the next 48 hours, the shade settles. This is known as the ‘rebound effect.’ For people with crowded teeth, this effect is magnified because the overlaps stay hydrated while the exposed surfaces dry out, leading to an even more uneven tone than you started with. If you keep chasing that ‘dehydrated white’ look, you’re just damaging your protein matrix for a temporary ghost-white effect. This is why the safest way to whiten teeth if you have thin enamel involves patience and pH-balanced formulas, not just higher concentrations of peroxide. 
Avoid the Blue-Gray Trap of Over-Bleaching
One of the most sophisticated mistakes I see is the ‘halo effect’—whitening only the front of the teeth and leaving the overlaps dark. This actually makes your teeth look smaller and more crowded because you are artificially increasing the visual depth of the shadows. It’s the same principle as contouring makeup, but in reverse. If you don’t use a delivery system that wraps around the tooth, you are essentially highlighting your orthodontic issues. For those with porcelain work, remember that why your porcelain veneers look opaque and unnatural in sunlight often comes down to the lack of translucency—the exact opposite of what happens when you over-bleach natural teeth. If your natural teeth become too translucent from over-bleaching, and your crowns remain opaque, the mismatch will be glaring. This is why transform your look with expert cosmetic dentistry solutions is the best path for multi-material smiles. Have you ever fallen into this trap of over-whitening until your teeth looked gray? Let me know in the comments. If you’re dealing with structural damage alongside color issues, dental crowns explained might provide the uniform aesthetic you’re actually looking for without the chemical risk.
Stop the Stain Before It Starts
Once you have successfully navigated the nuances of whitening crowded teeth, the real challenge begins: keeping that shade consistent. When your teeth overlap, they create high-friction zones where plaque—and eventually tartar—loves to set up camp. A landmark study in the International Journal of Periodontics & Restorative Dentistry highlights that crowded dentition significantly increases the rate of localized biofilm accumulation, which acts like a magnet for coffee and wine pigments. If you let that film sit in the overlaps, your ‘bright’ smile will look dull within weeks. I personally use a high-pressure water flosser every night to blast away the micro-debris that my brush simply can’t touch. It’s not just about hygiene; it’s about protecting your cosmetic investment. 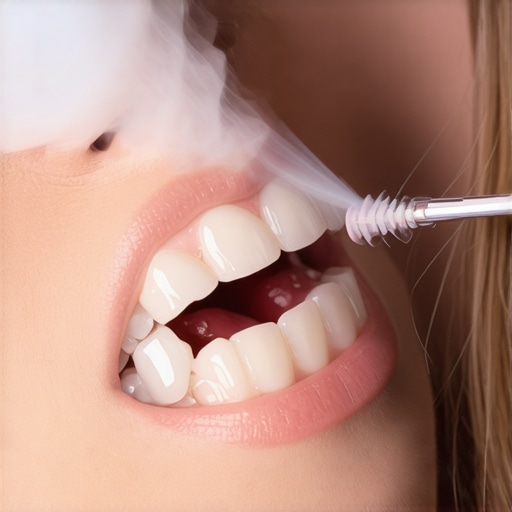
The Gadgets I Swear By for a Complex Smile
I’ve tested dozens of tools, but for a crowded mouth, two are non-negotiable. First, an electric toothbrush with a pressure sensor. When teeth are misaligned, we tend to over-scrub the protruding ones while neglecting the recessed ones. A pressure sensor ensures you aren’t thinning the enamel on your ‘front’ teeth while trying to reach the ‘back’ ones. Secondly, you need a tufted brush—a tiny, single-pointed brush head designed for precision. This is arguably the best way to brush around a permanent retainer or tight crowding. It allows you to mechanically polish those dark crevices where stains first reappear. It might add three minutes to your routine, but it’s the difference between a one-month glow and a one-year transformation.
How do I maintain my bright results over time?
Consistency is more important than intensity. Instead of doing a massive whitening session once a year, I recommend ‘micro-touch-ups’ every three to four months. This involves using your custom trays for just one or two nights to lift any new surface stains before they penetrate deep into the dentin. This is the secret to making professional teeth whitening results last longer without causing the sensitivity associated with long-term bleaching. Also, never skip your six-month cleanings; why a prophy treatment is much more than just a simple tooth cleaning becomes clear when the hygienist uses professional-grade grit to remove the stains you physically cannot reach at home.
AI and Biology Will Replace the Bleach Bottle
Looking ahead, I predict a massive shift away from harsh peroxides. We are already seeing the early stages of cosmetic dentistry innovations to watch, including bio-active gels that use enzymes to dissolve stains rather than acid to bleach them. In the next decade, I expect we will see AI-scanned, 3D-printed whitening shields that provide targeted delivery of enamel-rebuilding minerals alongside whitening agents. This will be a game-changer for those of us with crowded smiles, as the technology will account for every shadow and curve of our anatomy automatically. For now, focus on the fundamentals of essential family dentistry tips to keep your foundation strong. Grab a water flosser this week and commit to that one extra minute of precision cleaning; your future, brighter self will thank you.
The journey to a brighter smile when your teeth aren’t perfectly aligned is rarely a straight line. I spent years thinking my overlapping teeth were a curse that doomed me to a lifetime of patchy, uneven color. But I’ve learned that once you stop trying to force your unique anatomy into a generic mold, you can actually achieve incredible results. It’s about working with the curves, not against them.
The Reality Check I Needed Before Whitening My Crooked Smile
- Precision beats power every single time. I used to think the strongest peroxide would blast through the yellow, but it just caused pain. I learned that slow, targeted application using high-viscosity gels is the only way to reach those recessed areas without burning the gums.
- Moisture is the ultimate saboteur. If you don’t get the teeth bone-dry before applying your product, the whitening agent will float on a layer of saliva and never touch the enamel. This is why many people see no results in the tightest overlaps.
- The shadows aren’t always stains. Sometimes what we perceive as yellowing is actually just the natural way light falls on crowded teeth. Understanding transform your look with expert cosmetic dentistry solutions helped me realize that color is only half the battle; how light hits the surface matters just as much.
A Few Secrets to Keep Your Results From Fading
Maintenance is the part most people skip, but it is the most vital step for a crowded mouth. I personally rely on a high-quality water flosser to ensure no pigments get trapped in the ‘friction zones’ where my teeth overlap. I also highly recommend using a tufted brush; it is literally the best way to brush around a permanent retainer or any area where teeth are tightly packed. This tiny tool lets you manually polish away the daily coffee stains that a standard brush head would glide right over. Finally, don’t underestimate the power of a strong foundation. Keeping up with the role of family dentistry in ensuring oral health for all ages ensures your gums are healthy enough to handle the whitening process without inflammation or recession.
Your New Journey Toward a Brighter Smile Starts Now
You don’t need a perfectly straight Hollywood smile to have a radiant one. By switching from flat strips to custom-molded delivery systems and staying ahead of the cosmetic curve with revamp your smile top cosmetic dentistry trends for 2025, you can achieve a look that feels both natural and brilliant. Take it one step at a time, be patient with the process, and remember that professional guidance is always there to help you navigate the tricky spots. Your confidence is worth the extra effort it takes to whiten a unique smile correctly. Have you ever tried a custom-fitted tray for your whitening, or are you still struggling with those slippery store-bought strips? Let me know your experience in the comments below!